NGINX Unit なるものがリリースされたらしい。
・NGINX 公式サイトの情報 NGINX Unit
・NGINX Unit 公式サイト NGINX Unit
・見かけた記事 NGINXからアプリケーションサーバ「NGINX Unit」がオープンソースで登場。PHP、Go、Pythonに対応。Java、Node.jsにも対応予定 - Publickey
ドキュメントに書かれているインストール方法や設定を見てたらパッと出来そうだったので思いたってやったったの巻。
どうにも公式サイトのドキュメンテーションを見ると CentOS と Ubuntu 向けにはパッケージが適当されているっぽい。なのでコレを利用する。また nginx が既にいる環境でやると便利そうなので docker で立ち上げていく
// ホストにて
$ docker run --name nginx-unit -d -p 8080:80 nginx
$ docker exec -it nginx-unit bash

// 以降はコンテナ内、ゲストで作業

// 準備
# apt-get update
# apt-get install curl net-tools vim less

// キーの登録
# curl http://nginx.org/keys/nginx_signing.key > /tmp/nginx_signing.key
# apt-key add /tmp/nginx_signing.key

// /etc/apt/sources.list に追記
# vim /etc/apt/sources.list
deb http://nginx.org/packages/mainline/ubuntu/ xenial nginx
deb-src http://nginx.org/packages/mainline/ubuntu/ xenial nginx

// nginx-unit のインストール
# apt-get update
# apt-get install unit


// コンフィグ確認
# cat /etc/init.d/unit
CONFIG=/etc/unit/config

// /var/run/control.unit.sock が設定用のソケットファイルっぽい
    dumpconfig)
        curl -sS --unix-socket /var/run/control.unit.sock localhost >${CONFIG}.new


# vim /etc/unit/config
{
     "listeners": {
         "*:8300": {
             "application": "myapp"
         }
     },
     "applications": {
         "myapp": {
              "type": "php",
              "workers": 3,
              "root": "/var/www/html/",
              "index": "index.php"
         }
     }
}

// 起動
# service unitd start

// コンフィグの確認
# curl --unix-socket /var/run/control.unit.sock http://localhost/
{
        "listeners": {},
        "applications": {}
}

// コンフィグの変更してみる
# service unitd stop
# mv /etc/unit/config /etc/unit/myconfig.json
# service unitd start

# curl -X PUT -d @/etc/unit/myconfig.json --unix-socket /var/run/control.unit.sock http://localhost/
curl: (52) Empty reply from server

# curl --unix-socket /var/run/control.unit.sock http://localhost/

// レスポンスが返ってこない

// ログ確認
# less /var/log/unitd.log

// ... とくにエラーっぽいものなし。
パッケージのものだとうまく動かない???
ということでソースから入れる路線を試す。
// パッケージからのものを消す
# apt-get remove unit

// 準備
# apt-get install git build-essential php php-dev libphp-embed
# cd /tmp
# git clone https://github.com/nginx/unit
# cd unit

// ビルド
# ./configure --prefix=/usr/share/unit/
# ./configure php
# make all

// インストール
# make install
# ln -s /usr/share/unit/sbin/unitd /sbin/unitd

// 起動
# unitd

// 設定してみる
# vim /tmp/unit_config.json

{
     "listeners": {
         "*:8300": {
             "application": "myapp"
         }
     },
     "applications": {
         "myapp": {
              "type": "php",
              "workers": 3,
              "root": "/var/www/html/",
              "index": "index.php"
         }
     }
}


# curl -X PUT -d @/tmp/unit_config.json --unix-socket /usr/share/unit/control.unit.sock http://localhost/
{
        "success": "Reconfiguration done."
}

# curl --unix-socket /usr/share/unit/control.unit.sock http://localhost/
{
        "listeners": {
                "*:8300": {
                        "application": "myapp"
                }
        },

        "applications": {
                "myapp": {
                        "type": "php",
                        "workers": 3,
                        "root": "/var/www/html/",
                        "index": "index.php"
                }
        }
}

// 動作確認
# echo "<?php echo 'hello php';" > /var/www/html/index.php
# curl localhost:8300
hello php

// nginx からプロキシしてみる
# vim /etc/nginx/conf.d/default.conf

upstream unit_backend {
    server 127.0.0.1:8300;
}

server {
    listen       80;
    server_name  localhost;

    location / {
        root   /var/www/html;
        index  index.html index.htm;
    }

    location ~ \.php$ {
        proxy_pass http://unit_backend;
        proxy_set_header Host $host;
    }
}

// 動作確認
# service nginx reload
Reloading nginx: nginx.

# curl localhost/index.php
hello php
出来ているようなので、もう少しちゃんと PHP を動かしてみる。
// phpモジュール追加
# apt-get install php-mbstring php-zip

// composer 導入
# curl https://getcomposer.org/installer > installer
# php installer
# rm installer
# chmod +x composer.phar

// Laravelプロジェクトインストール
# ./composer.phar create-project laravel/laravel app

// Laravel プロジェクトの色々設定
# chmod -R 777 /var/www/html/app/storage/
# php artisan key:generate

// nginx-uniti のルートディレクトリを変更
#  curl -X PUT -d '"/var/www/html/app/public/"' --unix-socket /usr/share/unit/control.unit.sock http://localhost/applications/myapp/root
{
        "success": "Reconfiguration done."
}

// 確認
# curl --unix-socket /usr/share/unit/control.unit.sock http://localhost/
{
        "listeners": {
                "*:8300": {
                        "application": "myapp"
                }
        },

        "applications": {
                "myapp": {
                        "type": "php",
                        "workers": 3,
                        "root": "/var/www/html/app/public/",
                        "index": "index.php"
                }
        }
}


// nginx のルートディレクトリを変更
# vim /etc/nginx/conf.d/defualt.conf

    location ~ / {
        proxy_pass http://unit_backend;
        proxy_set_header Host $host;
    }

# service nginx reload


// 動作確認
# curl localhost

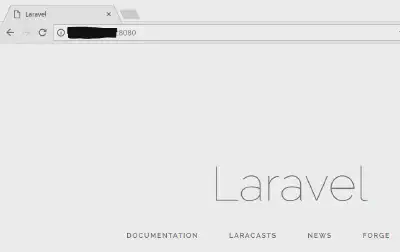
// 何か出ていそうなのでブラウザで開く…!

イエーイ! NGINX Unit で Laravel アプリケーションが動いたぞ~~~空っぽだけど…。
ご覧とおり php-fpm は動いてなくて unit のワーカーが動いてるだけですねー、しゅごい。
# ps aux
USER       PID %CPU %MEM    VSZ   RSS TTY      STAT START   TIME COMMAND
root         1  0.0  0.0  32648  3464 ?        Ss   00:50   0:00 nginx: master process nginx -g daemon off;
root         8  0.0  0.0  18224  2176 ?        Ss+  00:51   0:00 bash
root     26019  0.0  0.0  22196   852 ?        Ss   03:00   0:00 unit: main [unitd]
nobody   26021  0.0  0.0  32440   736 ?        S    03:00   0:00 unit: controller
nobody   26022  0.0  0.0 204620  1440 ?        Sl   03:00   0:00 unit: router
nobody   27293  0.0  0.7 269004 28232 ?        S    03:28   0:00 unit: "myapp" application
nginx    27330  0.0  0.0  33088  2152 ?        S    03:31   0:00 nginx: worker process
root     27331  1.2  0.0  18140  2064 ?        Ss   03:41   0:00 bash
root     27337  0.0  0.0  36572  1588 ?        R+   03:41   0:00 ps aux
現状では Go / PHP / Python に対応しているようで言語環境の準備と configure 時に言語指定すれば使えるようです。
手元にいい感じにお試せるアプリケーションがいないので細かい挙動の様子をみるなど出来ていないのですが、リリースニュース直後からはてぶが盛り上がったり github も盛り上がりを見せている(ように見える)ので、ちょっとしたバグなどなどあってももりもり直されていくんじゃないかなーという予感です。
そのうち Apache + mod_php / nginx + php-fpm / nginx + unit などでパフォーマンスも比べていきたいですねー!